Starting a blog can be the first step towards creating your ideal lifestyle business. But, a lot of first time bloggers are hesitant about taking the plunge.
Why?
The most common answer I usually hear is: “But I don’t know how to code! Will I be able to handle the tech stuff?”
Starting a blog can be intimidating, but there are tons of blogging platforms and programs that make the tech stuff user-friendly.
Check out this easy tutorial from Abby Larson that will teach you How To Start A Blog & Install WordPress!
Watch the full video below via Just A Girl And Her Blog.
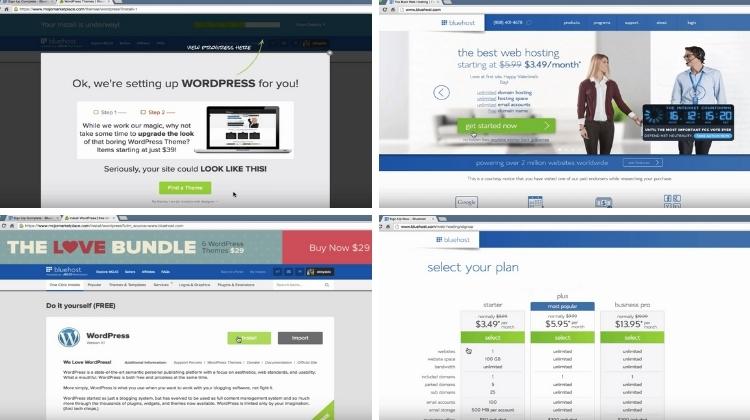
Part 1: Sign up for Bluehost
First, you need to sign up for your host. Use this affiliate link to get the absolute lowest price.
Step 1: Sign Up With An Affiliate Link
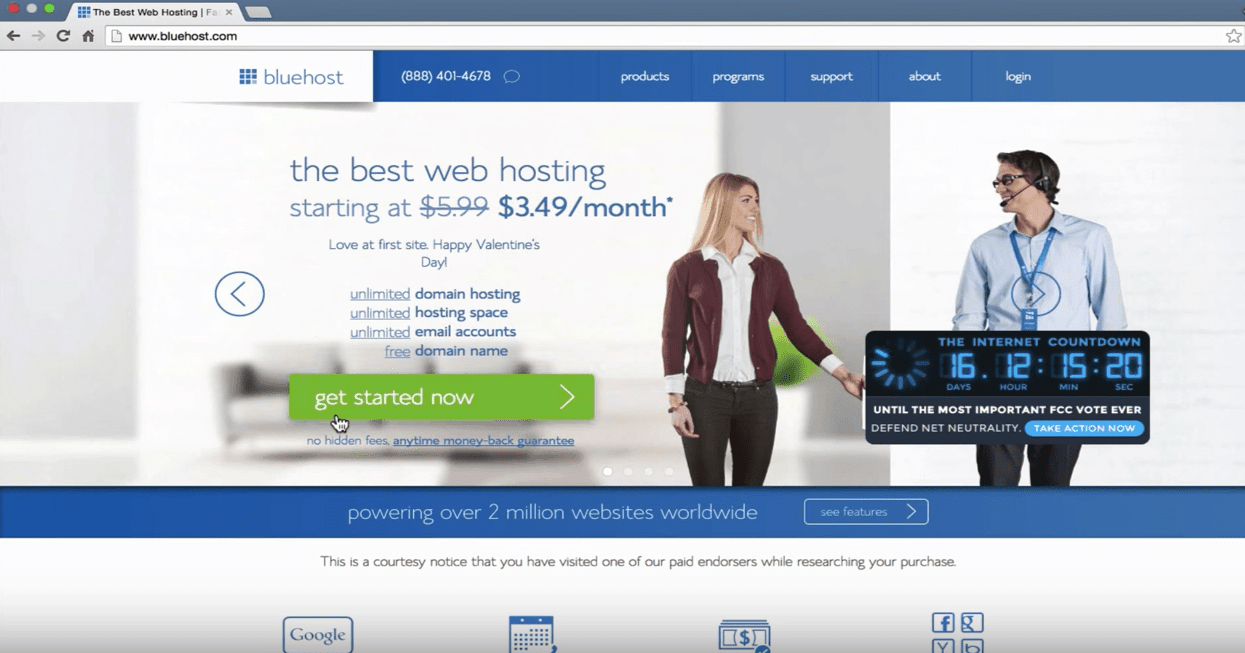
Using an affiliate link will ensure that you get the lowest price available. Use this link here.
Step 2: Select Your Plan
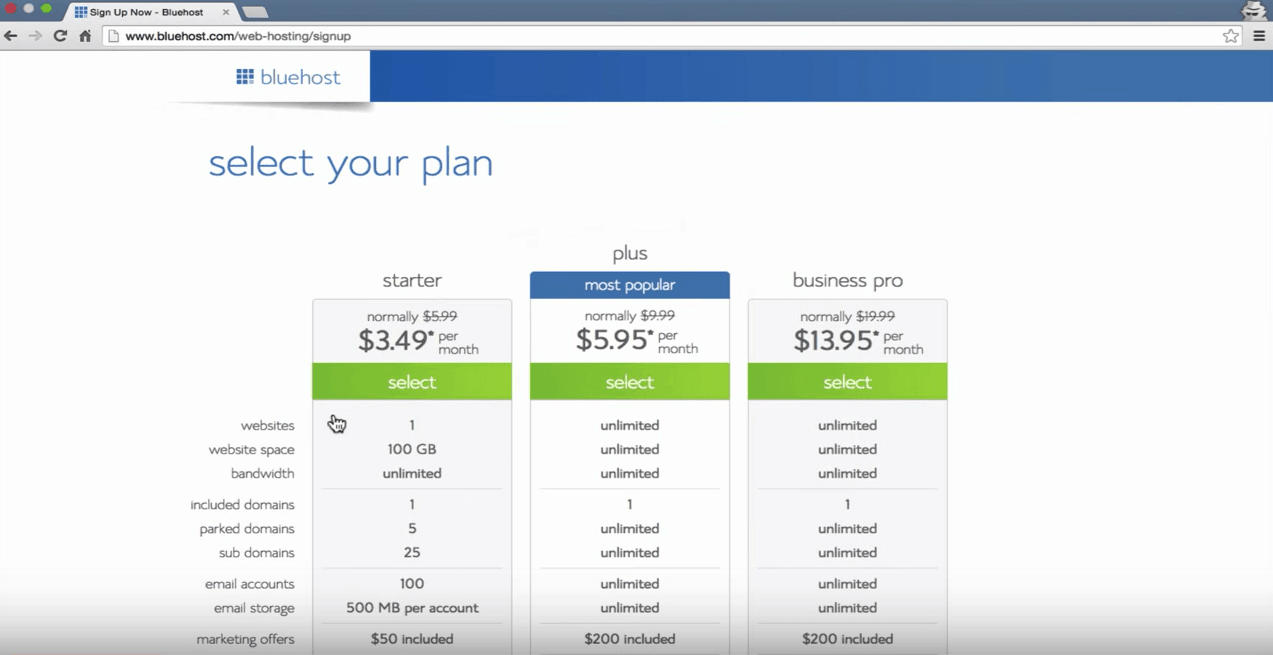
Select the plan that best fits your business needs. For most people starting out, the cheapest, “Starter” plan will be sufficient.
Step 3: Create Your Domain
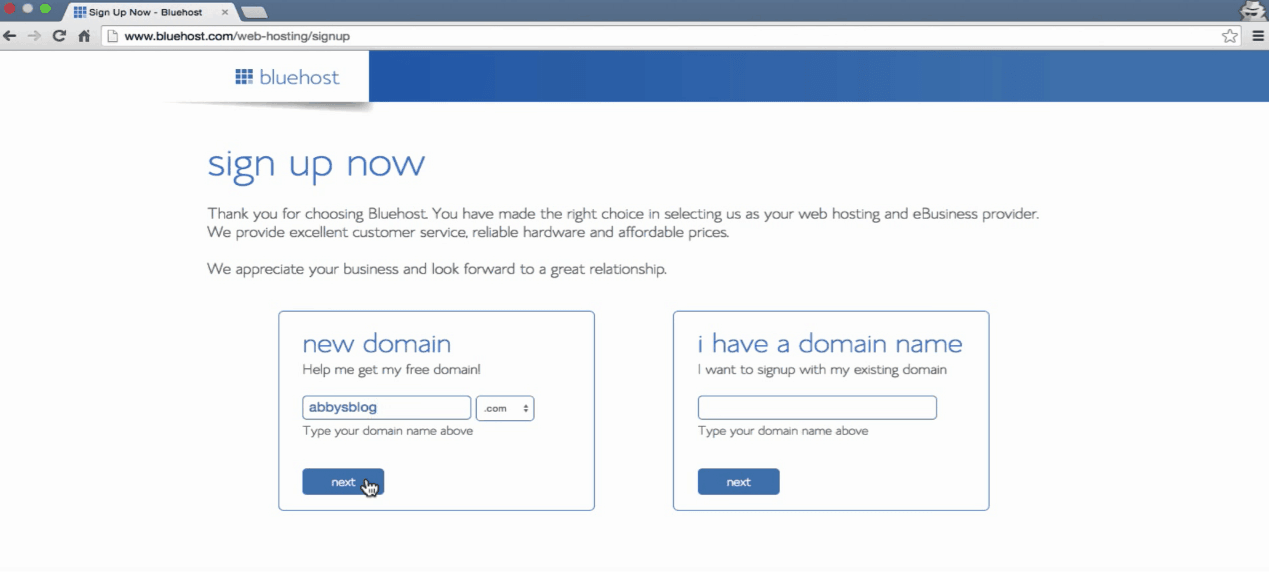
This is the web address of your blog. Once purchased, Abby’s example, “abbysblog” will become “www.abbysblog.com.”
Once you select your domain, BlueHost will search the web to make sure the domain you’ve chosen is available. If it isn’t, you’ll have to select a new domain name to try.
Step 4: Create Account and Pre-Pay
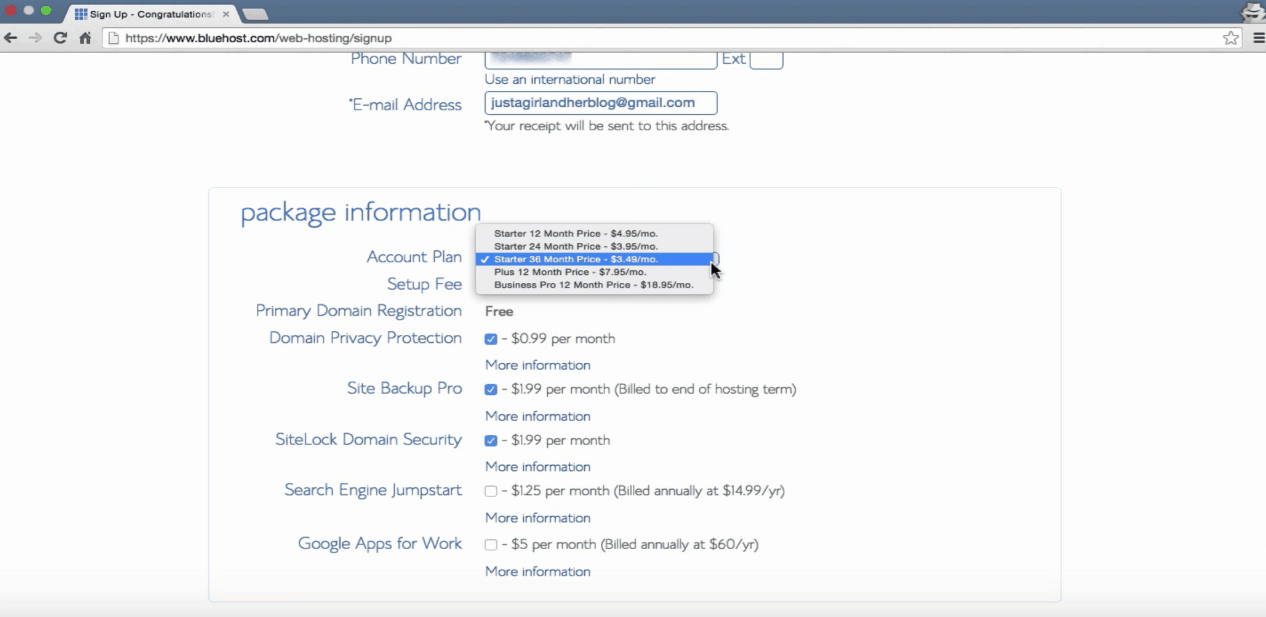
BlueHost requires that you pre-pay for at least 12 months when you sign up for a package. However, if you cancel your membership before the package is up, they will refund you for the leftover months. This way, it’s zero risk to sign up.
The cheapest package is the 36 months pre-pay.
Step 5: Select Any Upgrades
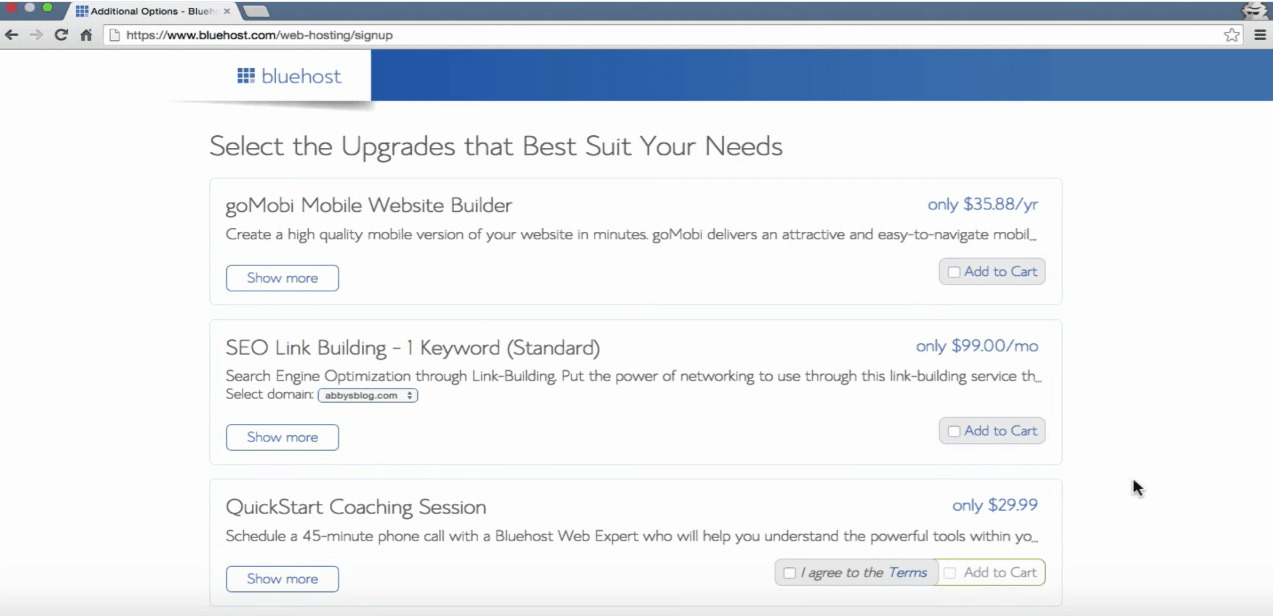
These are add-ons. Different upgrade options might apply to select businesses. You can always come back later and upgrade. You don’t have to do it immediately, so feel free to skip if you aren’t sure you want to commit to one immediately.
Step 6: Create Your Password
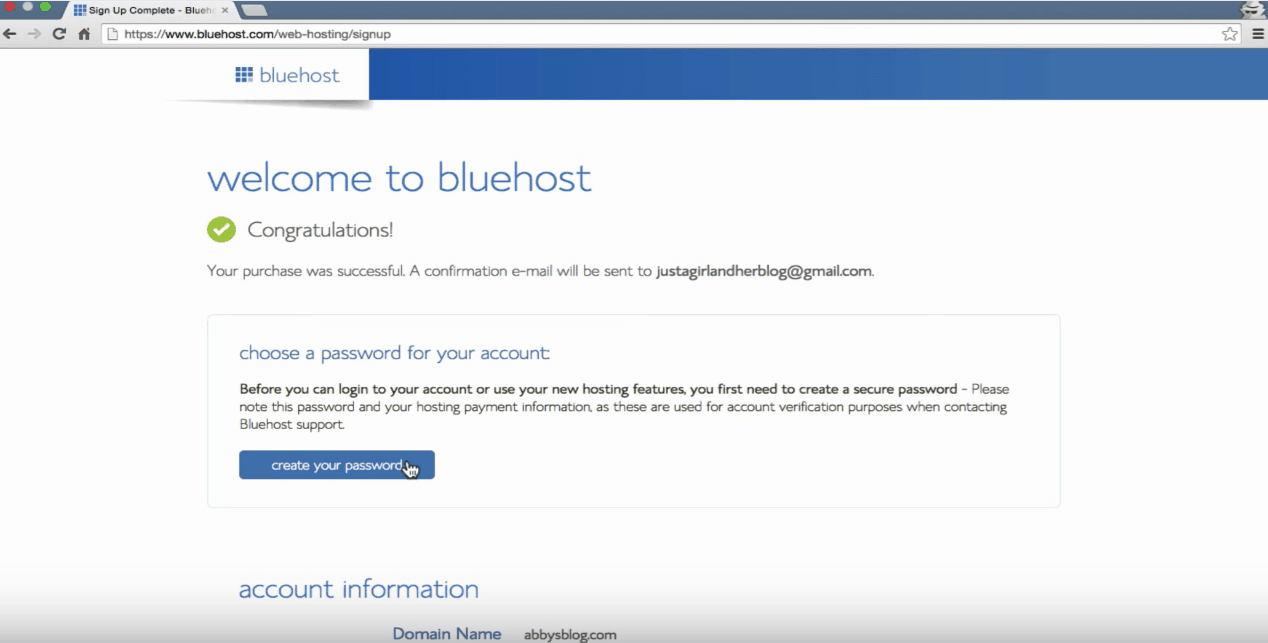
Create a password and accept the terms & conditions to finish signing up for your account.
Part 2: Install WordPress
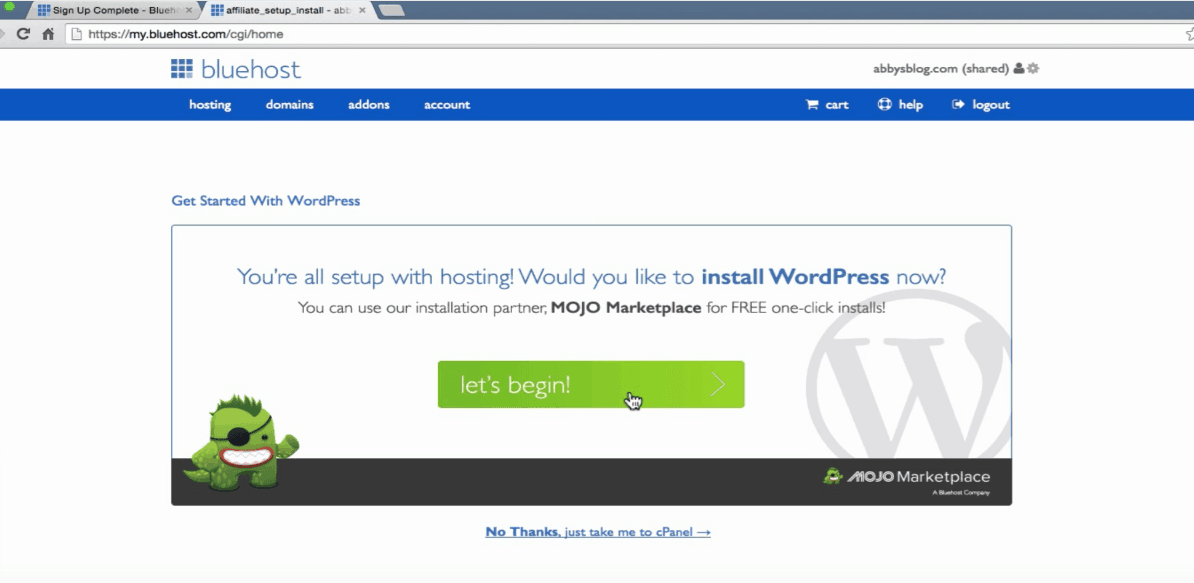
Next, you need to install WordPress to the domain you just created in BlueHost. You can access the download page directly from BlueHost.
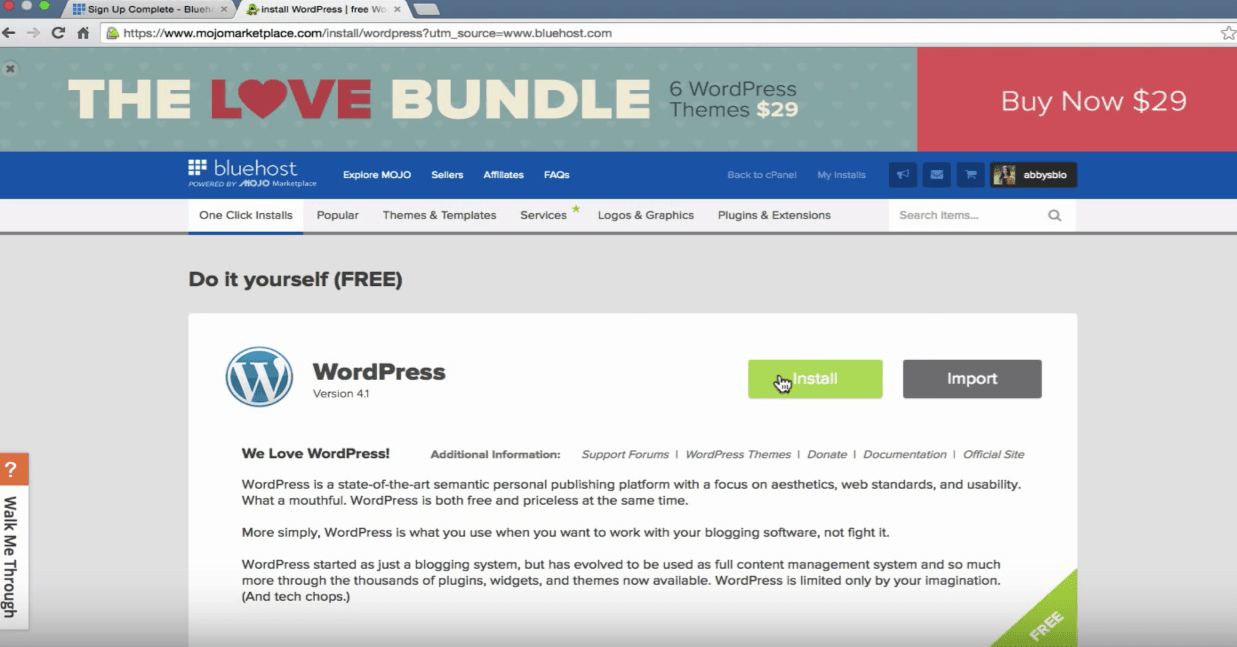
Step 7: Press Install
Step 8: Select The Domain You Will Install To
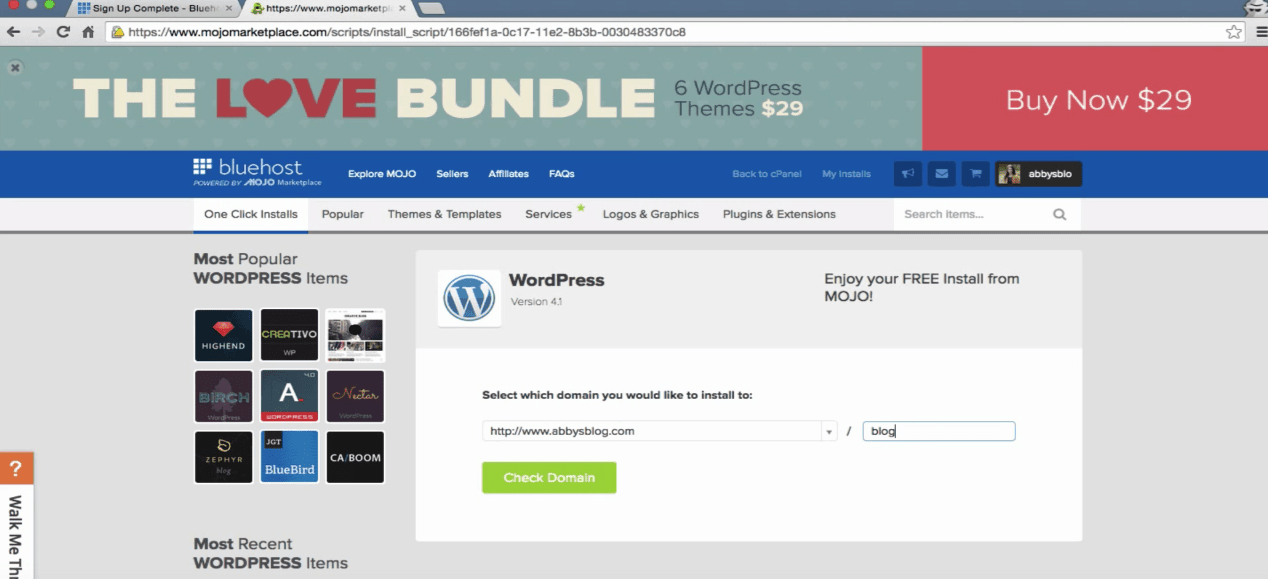
For most people, this is just the name you selected on BlueHost. Some people may want to add the directory fill, but most people will leave it blank. Then, just select, “Check Domain.”
Step 9: Agree To Terms & Install
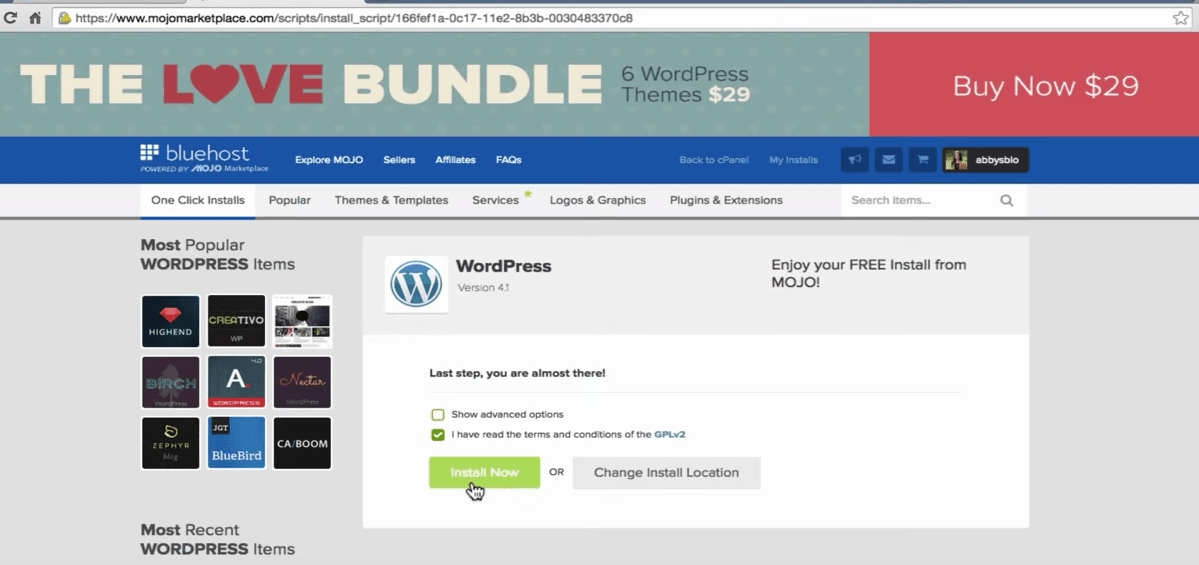
Just check the terms & conditions box and install WordPress with the click of a button.
Step 10: Find A Theme
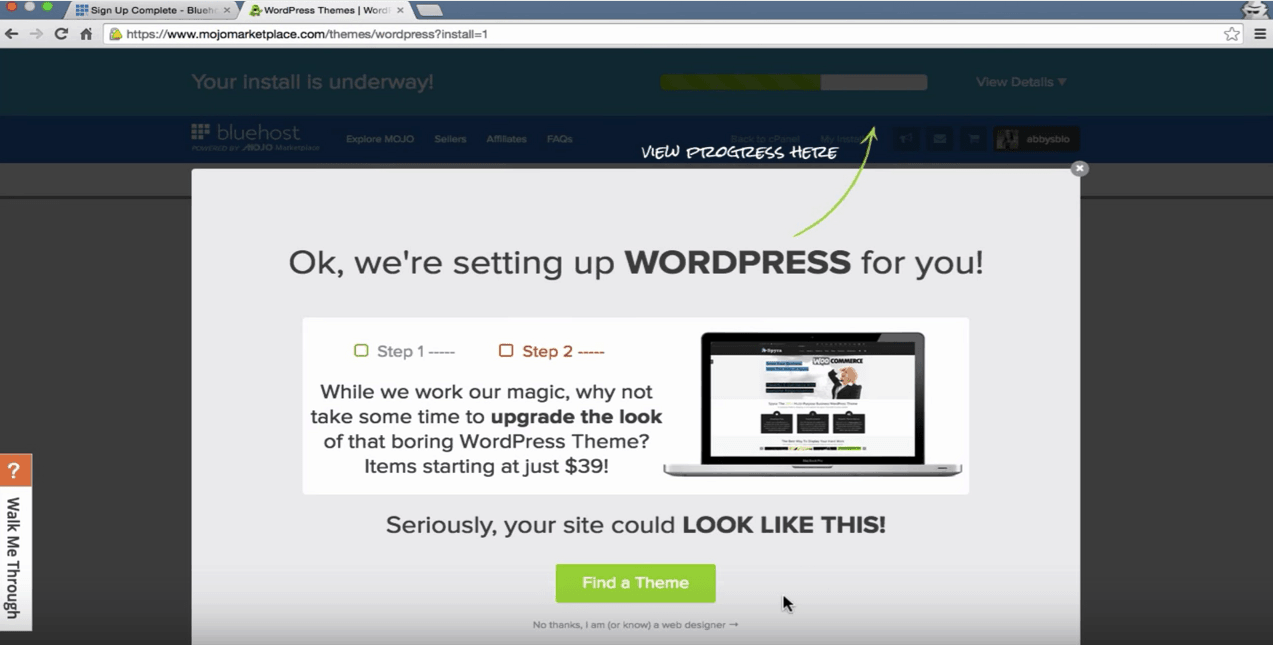
When you install WordPress, it comes with a default theme. Many bloggers may choose to eventually purchase a different theme which will help change the layout and aesthetic of your blog overall.
You can go to Abby’s blog for her personal theme recommendations here.
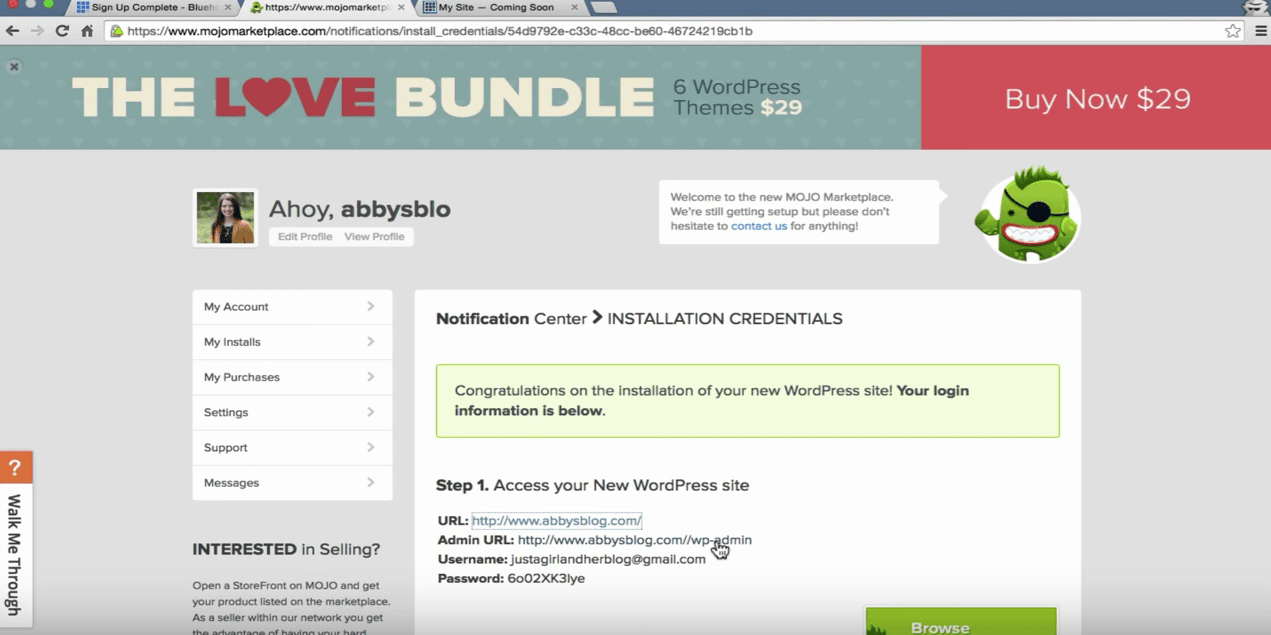
Step 11: View Your Credentials
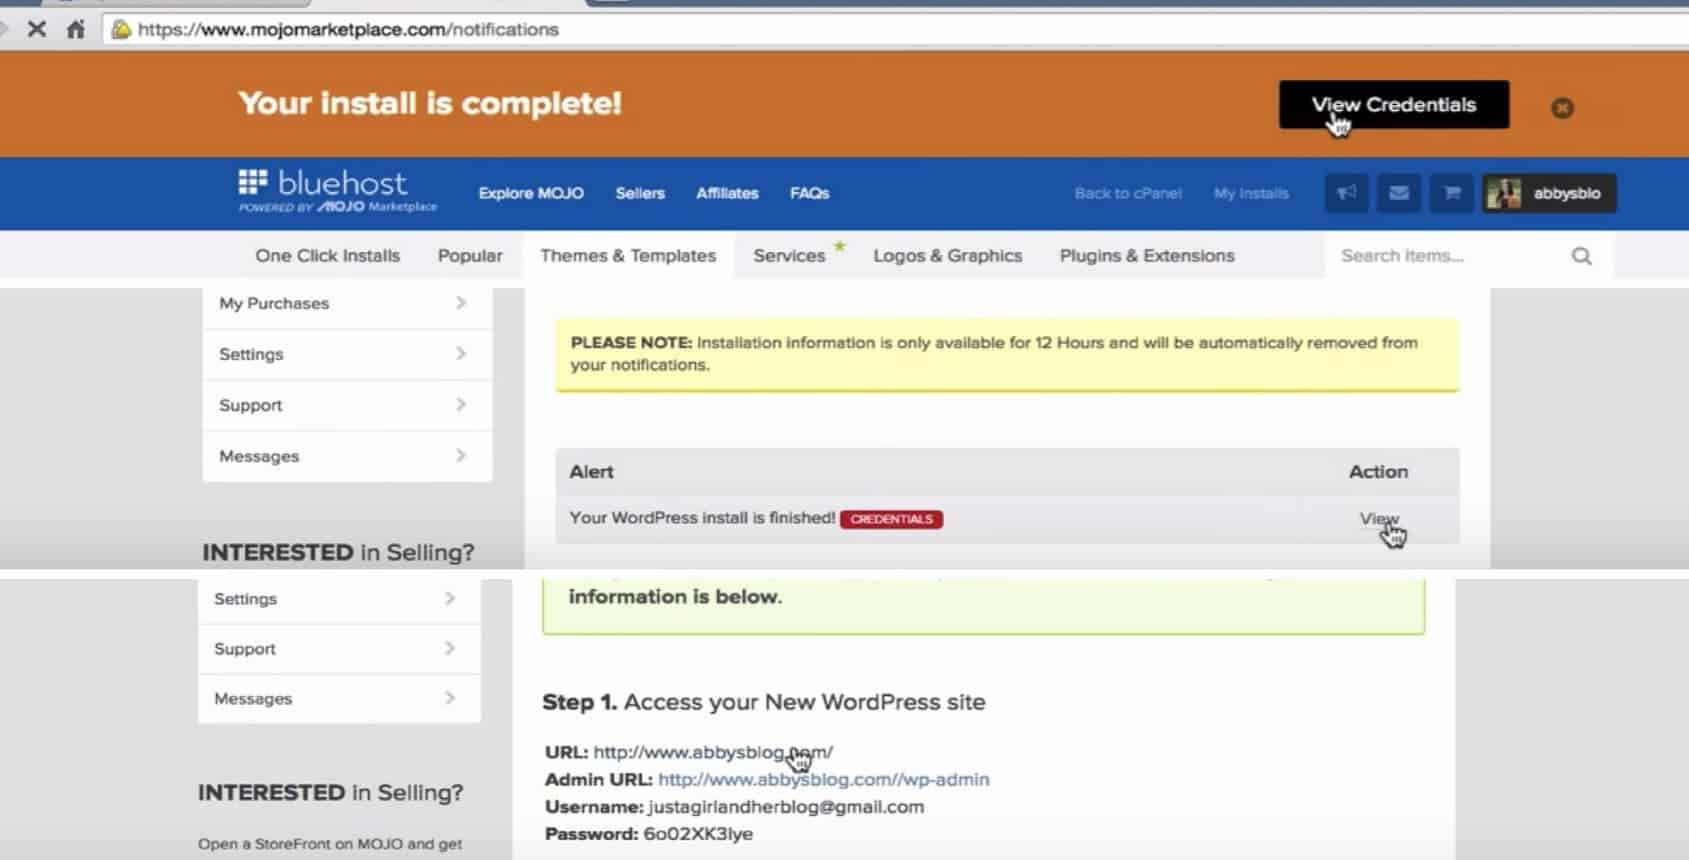
Your credentials include your username and password. They also include a link to view your site, as well as an admin URL which lets you access the backend of your site.
Step 12: Use Your Admin URL to Log In
This will give you access to the backend of your WordPress site where you can publish blog posts and customize your site. This is where most of the blog magic happens.
Step 13: View Your Dashboard

Your dashboard houses all of the different items you have control over in relation to your blog. It also shows your latest activity.
Step 14: Compose a Post
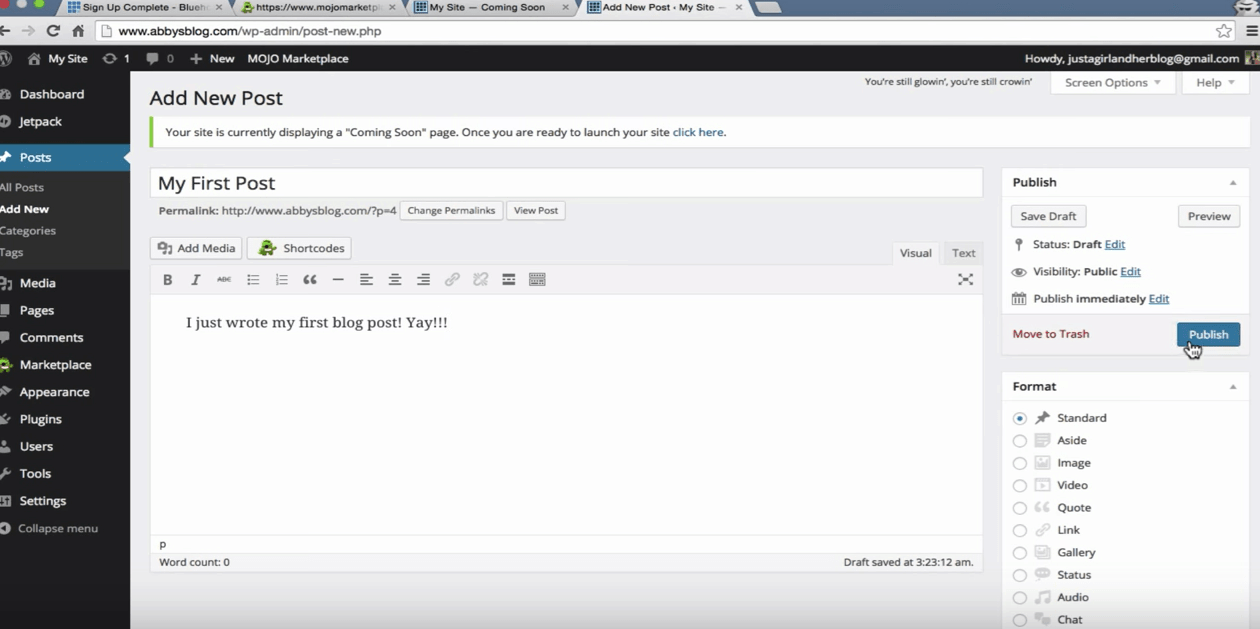
Click on “Posts,” and then “Add New.” Now you can start writing or laying out your very first blog post! When you’re done, just hit “Publish” on the right side to make your post live on your site.
Step 15: Click On Site URL To View The New Post
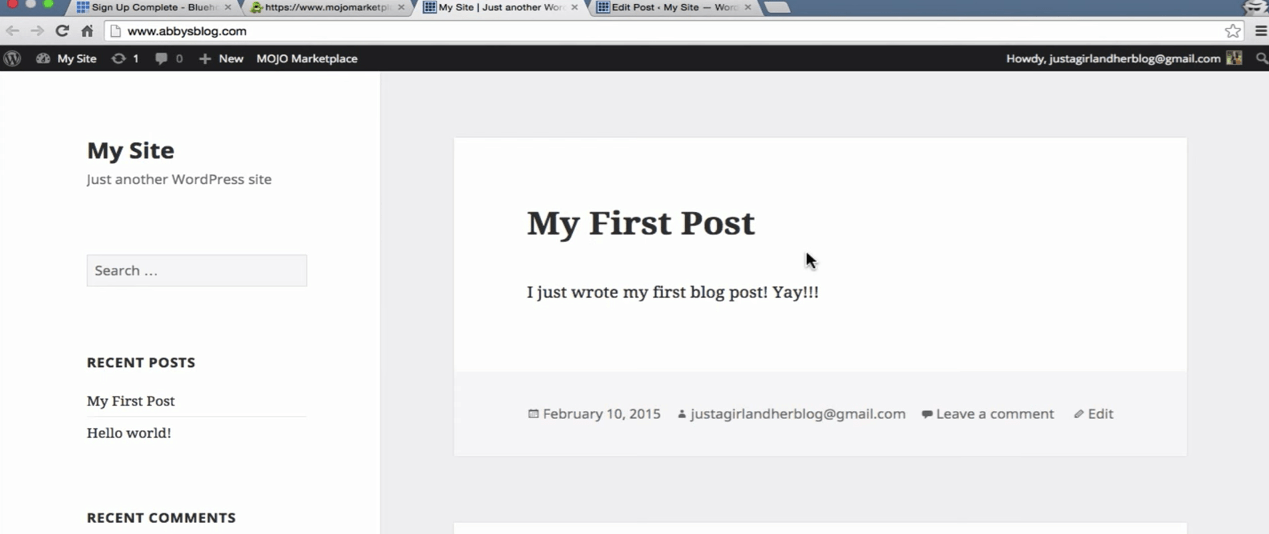
Type in your URL from your credentials in Step 11 to view your published post!
Check out the full video tutorial via Abby at Just A Girl And Her Blog.
Voila, you’re done!
If you’ve followed the steps above, you’ve successfully set up your host account AND installed WordPress. The blogging world is now your oyster.
See? That wasn’t so hard!
Now, want to know how to turn your blog into a profitable business?
Sign up for my “Launch Your Six Figure Blog This Weekend” training. You’ll get access to the formula I used to monetize my blog and build a successful lifestyle business.
From growing your blog traffic to creating your email newsletter, this training will teach you everything you need to know about launching a profitable blog.
Enroll here!